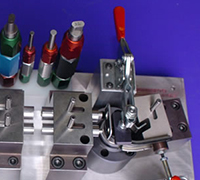
Bracket Attribute Gage
This gage was designed to check attributes and limits on left- and right-hand parts as they were coming off the die. Our Tier 1 automotive customer was using one gage at its press, one in its QA lab and one supplied to its customer. Wisconsin Metal Parts worked from the customer’s CATIA model and designed a gage to incorporate all of their part print GD&T tolerances. This gage helped our customer reduce internal PPM to less than 250.


To learn more about this project, including tolerances and inspection processes, please contact us today or see the table below.
Project Details
| Product Description |
|
||
| Capabilities Applied/Processes |
|
||
| Equipment Used to Manufacture Part | Solidworks, WEDM, Jig grinding, CNC form grinding, CNC machines, CNC turning | ||
| Overall Part Dimensions | Length: 10” Width: 14” |
||
| Tightest Tolerances | ±.0001” | ||
| Material Used | Aluminum, tool steel | ||
| Max Material Finish | 63Ra | ||
| In Process Testing/Inspection Performed | In-house CMM report | ||
| Estimated Part Weight | |||
| Industry for Use | Automotive off-road | ||
| Volume | |||
| Delivery Location | Wisconsin | ||
| Standards Met | Customer supplied CATIA file, Customer gage standards | ||
| Product Name |
Bracket Attribute Gages |


